This blogpost will explain how to setup a connection between your Sitecore Content Hub and Azure Active Directory. There is a lot of documentation available from Microsoft, also from Sitecore, but not how to setup the two parties. This blogpost contains the basic setup that you need to get started.
Before we start, lets us first ask ourself the question, why do we need this? The Content Hub offers also allows you to create user accounts and assign roles and such. So why do we want to use Active Directory for this?
The advantages to use Active Directory with the Content Hub are many. The biggest advantage is not having to duplicate the account data in both Active Directory and Content Hub. This will save costs for not having to maintain two accounts for each system. Also your end-users will like you, for not having yet another account to remember. The end-users can benefit from login in only once. This seamless integration is also known as single sign on or SSO for short.
Enough with the soft talk, let us dive into the technical stuff.
Prerequisites:
- Create a local Content Hub account with the role of super user. This is important, because when the SSO login doesn't work, you can login to correct the error
- Make sure to set the authentication mode to Passive. This step will also be explained in the documentation, but it's better to this up front. This way, you can't forget get to do this. It will make sure you can log into your Content Hub instance with a local account.
- Verify that the account is able to login in with superuser rights before you continue
Setup up Active Directory
- Go to Portal Azure
- Open your Azure Active Directory
- Click on Enterprise application
- Click on + New application
- Choose Non-gallery application
- Enter the name for the app and click on Add
- Wait for the Application to be created
- First add a user to the app, click on the Assign users and groups
- Select your users(s)
- Now that we have chosen to use SAML we can continue with configuring it. Click on the "Edit" button next to the Basic SAML Configuration
- In this page we will configure the SAML Identifier and reply URL. For the Identifier you can fill in a text with ever you want. For the reply URL you should enter the URL of the Content Hub instance. Store the Identifier in a Notepad, because we will need this value later. Click the "Save" button when you've filled in both fields.
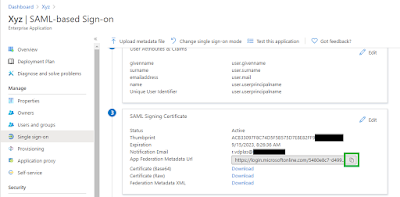
- The SAML configuration is done. We are going to need the App Federation Metadata Url. Store in Notepad app for later.
- Another thing that we are going to need is the Azure AD Identifier. Make sure to copy the setting as well and store in with the other values that we need.
This concludes the setup for Active Directory. We advance to adjust the Content Hub to use Azure Active Directory as their Identity Provider.
Configure Sitecore Content Hub
- Browse to your Content Hub instance and login with a super user account
- After logging in, go to the Manage page and click on Settings
- Open Portal Configuration -> Authentication. Copy the current configuration and store this for safe keeping in your Notepad app or better in your Git repo.
- Now that we've secured the default configuration, we can start making some adjustments.
- If you haven't changed the authentication_mode to Passive, do so now. This will ensure that you're able to login in the Content Hub with a local account if SSO fails.
- Change the metadata_location with the copied URL from the App Federation Metadata Url
- Change the sp_entity_id to YourUniqueIdentifier that you set in SSO options earlier in the Identifier (Entity ID) option
- The last value that we need to change is the idp_entity_id. This needs to get the value that we copied from Azure AD Identifier.
- After the changes hit the "Save" button
- Now we start testing if the connection between Azure Active Directory and Content Hub actually works. Leave the current window open and start a new private browser session. This will make sure that you've an active super user session. This will allow you take make changes or restore the changes completely.
To fully benefit the connection between the two systems, you'll need to connect the account information from Active Directory with roles in the Content Hub. You can read more on this in the blogpost. If you're interested in the subject, go to the Sitecore Content Hub documentation.


